Obsidian Notes -> Blogs
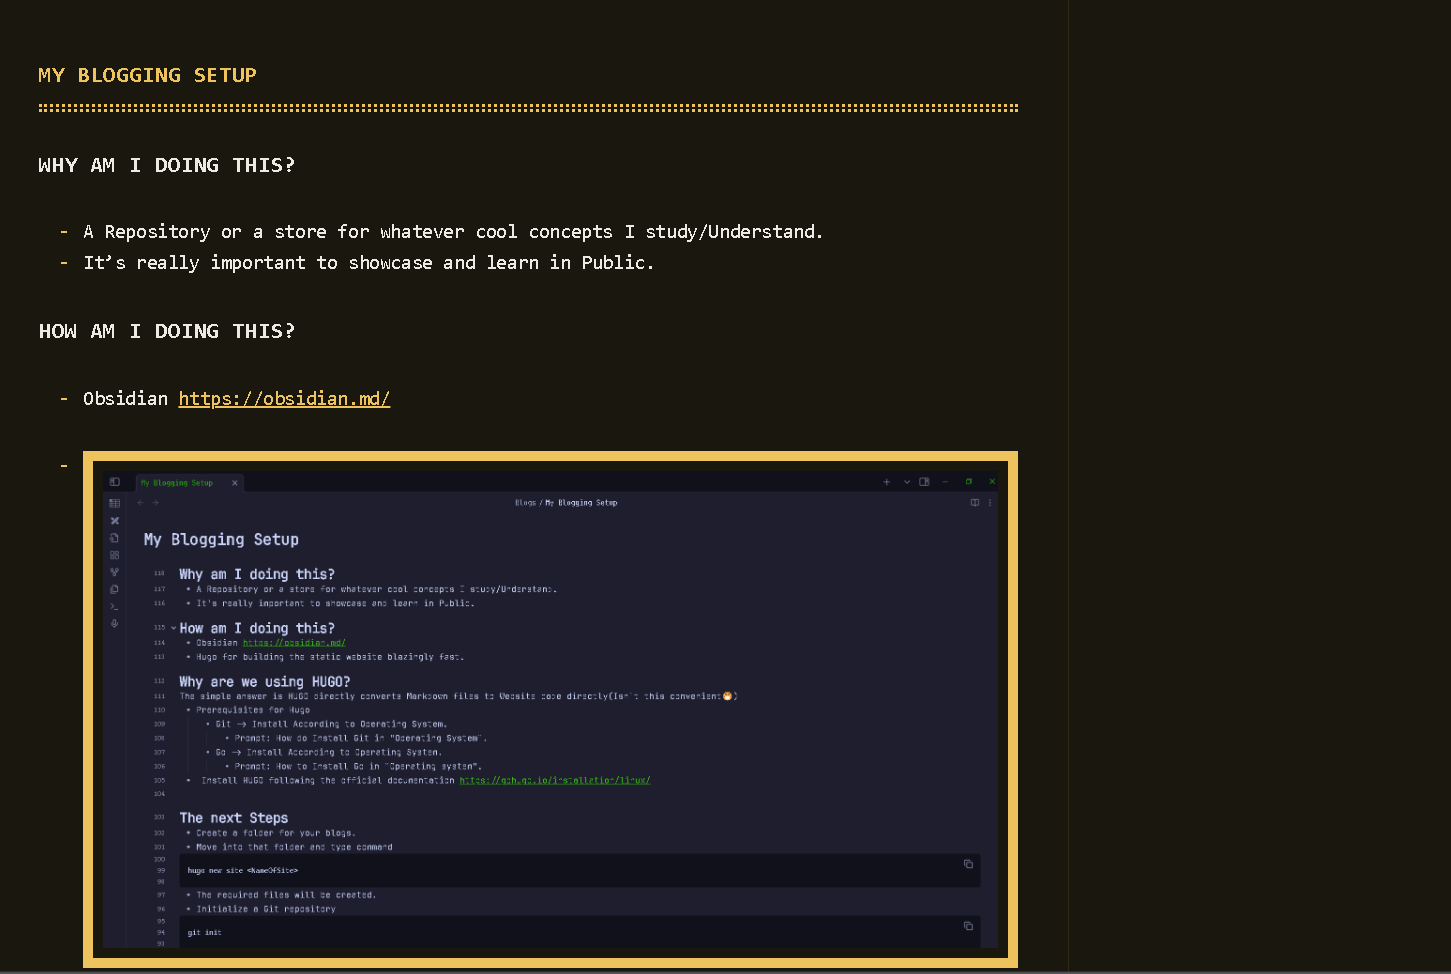
Why am I doing this?#
- A Repository or a store for whatever cool concepts I study/Understand.
- It’s really important to learn in Public.
How am I doing this?#
- Obsidian https://obsidian.md/
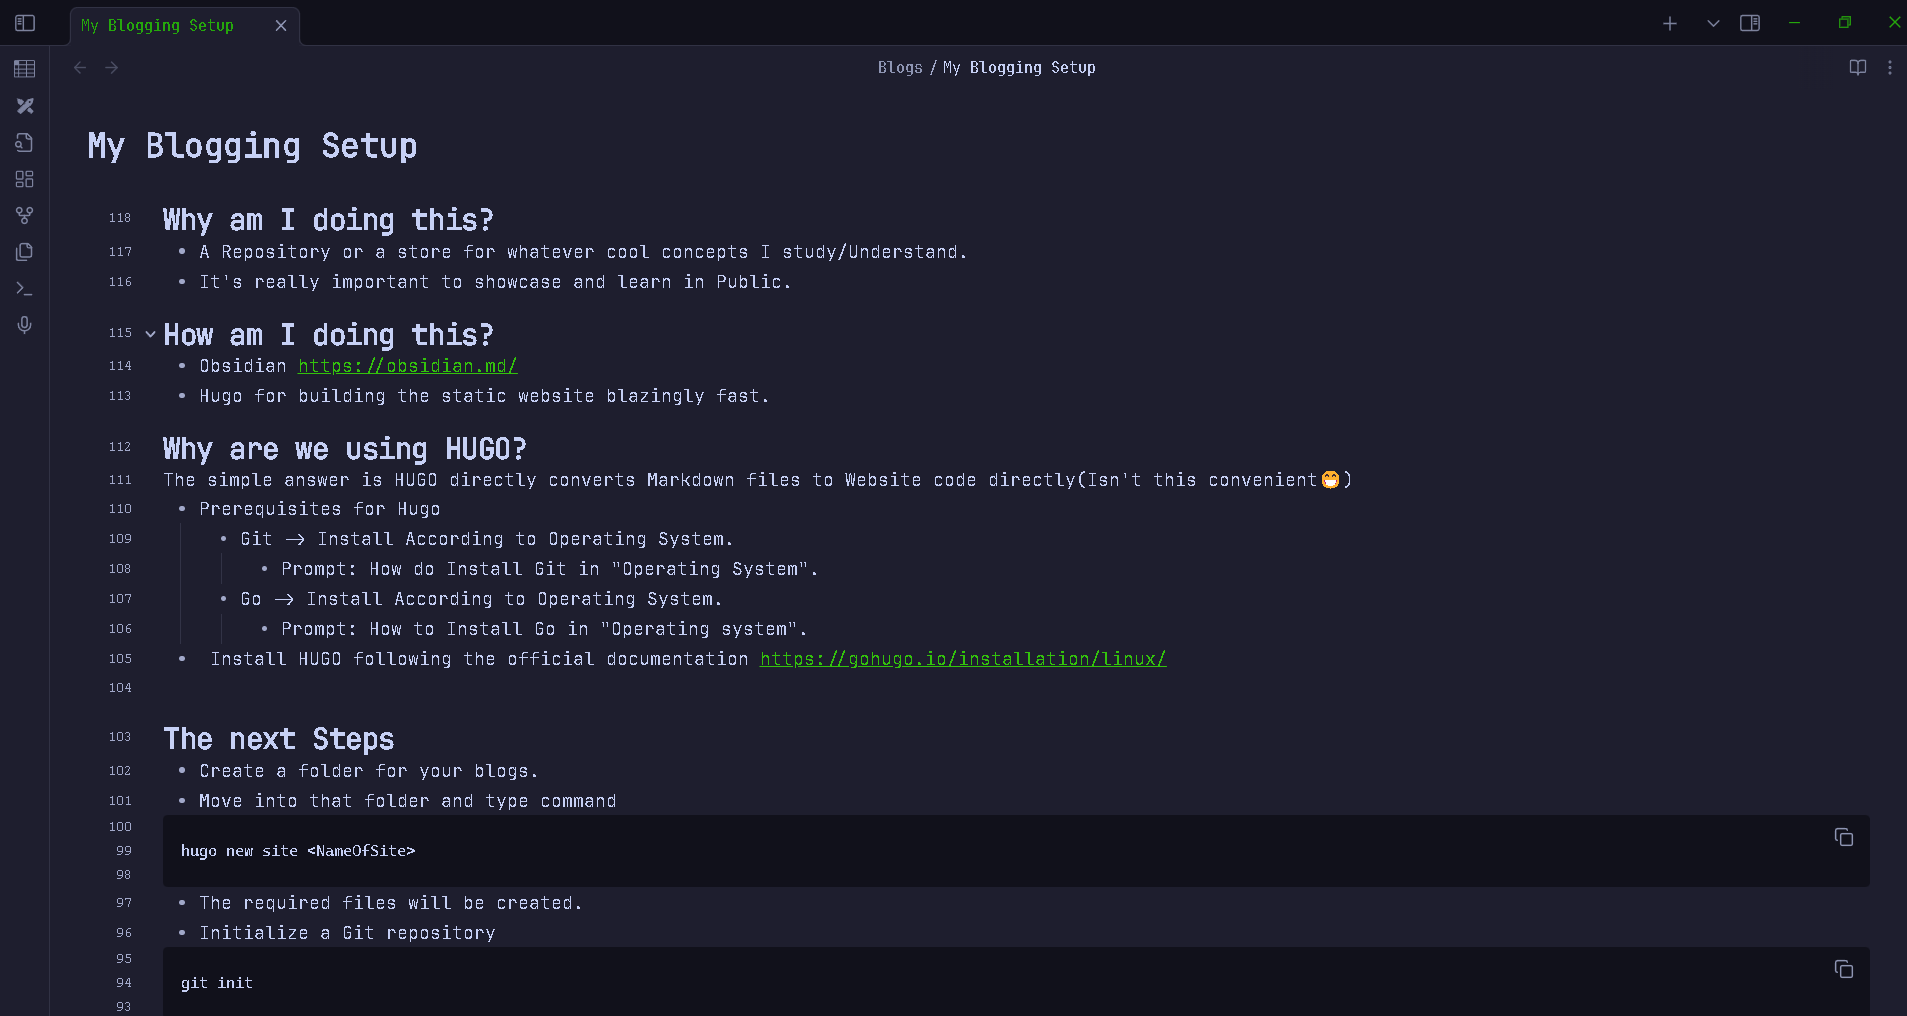
- Hugo for building the static website blazingly fast.
Why are we using HUGO?#
The simple answer is HUGO converts Markdown files to Website code directly(Isn’t this convenient😁)
- Prerequisites for Hugo
- Git -> Install According to Operating System.
- Prompt: How do Install Git in “Operating System”.
- Go -> Install According to Operating System.
- Prompt: How to Install Go in “Operating system”.
- Git -> Install According to Operating System.
- Install HUGO following the official documentation https://gohugo.io/installation/linux/
The next Steps#
- Create a Folder for your blogs.
- Move into that folder and use command
hugo new site <NameOfSite>
- The required files for HUGO will be created.
- Initialize a Git repository
git init
- Choose a exciting theme of choice. -> https://themes.gohugo.io/
- After choosing a theme, -> https://themes.gohugo.io/themes/hugo-theme-terminal/
- Find “Install theme as submodule” this is the easiest and best way to use the Theme.
//similar to this command
git submodule add -f https://github.com/panr/hugo-theme-terminal.git themes/terminal
- We need to configure the “config.toml” file in order to render the theme (e.g. Config file for terminal theme)
// Example config for terminal theme
baseurl = "/"
languageCode = "en-us"
# Add it only if you keep the theme in the `themes` directory.
# Remove it if you use the theme as a remote Hugo Module.
theme = "terminal"
paginate = 5

[params]
# dir name of your main content (default is `content/posts`).
# the list of set content will show up on your index page (baseurl).
contentTypeName = "posts"

# if you set this to 0, only submenu trigger will be visible
showMenuItems = 2
# show selector to switch language
showLanguageSelector = false
# set theme to full screen width
fullWidthTheme = false
# center theme with default width
centerTheme = false

# if your resource directory contains an image called `cover.(jpg|png|webp)`,

# then the file will be used as a cover automatically.

# With this option you don't have to put the `cover` param in a front-matter.
autoCover = true

# set post to show the last updated # If you use git, you can set `enableGitInfo` to `true` and then post will automatically get the last updated
showLastUpdated = false

# Provide a string as a prefix for the last update date. By default, it looks like this: 2020-xx-xx [Updated: 2020-xx-xx] :: Author
# updatedDatePrefix = "Updated" # whether to show a page's estimated reading time # readingTime = false # default
# whether to show a table of contents
# can be overridden in a page's front-matter
# Toc = false # default
# set title for the table of contents
# can be overridden in a page's front-matter
# TocTitle = "Table of Contents"
# default [params.twitter]
# set Twitter handles for Twitter cards
# see https://developer.twitter.com/en/docs/tweets/optimize-with-cards/guides/getting-started#card-and-content-attribution
# do not include
@ creator = ""
site = ""
[languages]
	[languages.en]
		languageName = "English"
		title = "Terminal"

	[languages.en.params]
		subtitle = "A simple, retro theme for Hugo"
		owner = ""
		keywords = ""
		copyright = ""
		menuMore = "Show more"
		readMore = "Read more"
		readOtherPosts = "Read other posts"
		newerPosts = "Newer posts"
		olderPosts = "Older posts"
		missingContentMessage = "Page not found..."
		missingBackButtonLabel = "Back to home page"
		minuteReadingTime = "min read"
		words = "words"
		[languages.en.params.logo]
			logoText = "Terminal"
			logoHomeLink = "/"
		[languages.en.menu]
			[[languages.en.menu.main]]
				identifier = "about"
				name = "About"
				url = "/about"
			[[languages.en.menu.main]]
				identifier = "showcase"
				name = "Showcase"
				url = "/showcase"
- After this a simple command of
hugo server -t <themename>
Now lets see some text rendering? 🖋️#
- But there seems to be problem😐, the obsidian blog folder and our hugo blog folder are in different locations.
- The content in them should sync simultaneously.
- We will solve this problem using a very specific command both in linux and Windows.
linux
rsync -av --delete "sourcepath" "destinationpath"
Windows
robocopy sourcepath destination path /mir
Now lets render the images#
- One more problem that we see here is the rendering of images.
- The problem arises because obsidian keeps a different attachments folder for media.
- Now we need to copy the images used in our blog to the Hugo codebase.
- So we will use a python script to copy all the used images from the attachments folder to folder inside static/images/
- Use this python script naming it as images.py and run it to see the magic😁.
import os
import re
import shutil
# Paths
posts_dir = "<Blog.md Destination inside>"
attachments_dir = r"<Path where obsidian stores its images>"
static_images_dir = "<Path of static/images directory where you want to copy your images"
# Base URL for Hugo
baseURL = "https://whitewolf2000ani.github.io/AnikiBlogs"
# Ensure static images directory exists
if not os.path.exists(static_images_dir):
os.makedirs(static_images_dir)
# Function to normalize image names (replace spaces with underscores)
def normalize_image_name(image_name):
return image_name.replace(" ", "_")
# Process each Markdown file in the posts directory
for filename in os.listdir(posts_dir):
if filename.endswith(".md"):
filepath = os.path.join(posts_dir, filename)
with open(filepath, "r") as file:
content = file.read()
# Find all image links in the format `![[filename.extension]]`
images = re.findall(r"!\[\[([^]]+\.(?:png|jpg|jpeg|gif|webp))\]\]", content)
for image in images:
# Normalize the image filename
normalized_image_name = normalize_image_name(image)
# Original and normalized filenames
image_with_spaces = image
image_with_encoded_spaces = normalized_image_name
# Path to the original image
image_source = os.path.join(attachments_dir, image_with_spaces)
print(f"Checking for image: {image_source}")
# Replace Markdown link with a Hugo-compatible link
new_image_link = f""
content = content.replace(f"![[{image_with_spaces}]]", new_image_link)
# Copy the image to the static directory if it exists
if os.path.exists(image_source):
# Copy the image to the static directory with a normalized name
shutil.copy(image_source, os.path.join(static_images_dir, normalized_image_name))
print(f"Copied: {image_source} -> {static_images_dir}/{normalized_image_name}")
else:
print(f"Image not found: {image_source}")
# Write updated content back to the file
with open(filepath, "w") as file:
file.write(content)
print("Markdown files processed and images copied successfully.")
- After using the below script run.
python3 images.py
-
This will copy all the images used in the current blog to the images folder inside static.
-
After the images are copied.
-
Run the file syncing command.
-
Start the Hugo server.
Whoosh the image has been rendered on our localhost.
Do we always have to run the sync command and then copy the images?#
- The simple answer is yes, but we will automate the entire task using a python script at the end of the blog.
Now let’s put this out in the open(Pun intended)😁#
- Remember the “git init” command we used to initialize a git repository, now we will use the local repo.
- Step 1: Go to www.github.com
- Step 2: Create a new repository.
- step 3: Connect the local repository to your remote repository.
git remote add origin </ssh /https link>
- step 4: Run Hugo to create all the necessary changes.
hugo
- Step 5: Now add all the changes made.
- Step 6: Commit these changes with a valid comment.
git add.
git commit -m "My, first commit to the blog"
- Step 7: Push these changes to GitHub/ remote.
git push -u origin master
- Now we will see the changes in our Remote GitHub Repository(or simply on the GitHub Website).
Now the moment of Truth, where should we host our website 🤔?#
- Vercel/ GitHub pages/ Hostinger.
- I will be using GitHub pages.
- It’s good for static websites.
- It’s free 😍.
- Let’s do it.
- Step 1: We are creating a separate branch for deploying the Blog.
git checkout --orphan gh-pages
git rm -rf .
echo "This is the gh-pages branch" > README.md
git add README.md
git commit -m "Initialize gh-pages branch"
git push origin gh-pages
- Step 2: Configure GitHub pages.
- Inside your blogs repository there is click on the settings icon.
- Navigate to the Code and Automation Section.
- Click on Actions.
- Click on General.
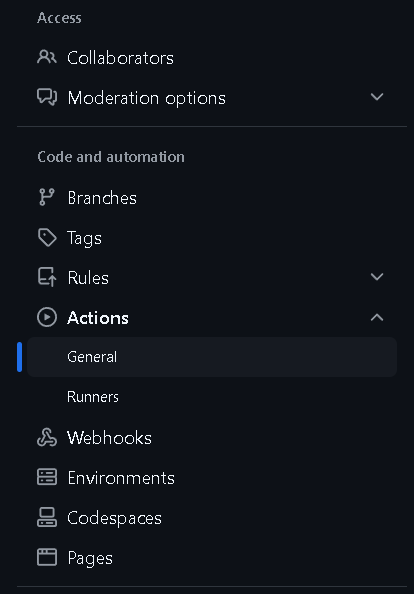
- Under the Workflow permissions-> click on Read and Write permissions.
- Step 3: Under the Pages section set the source to gh-pages branch and /root directory.
- Step 4: Now checkout to the master branch
git checkout master
- Step 5: Create the
.github/workflows/deploy.ymlfile with the deployment instructions.
name: Deploy Hugo to GitHub Pages
on:
  push:
    branches:
      - master  # Your main branch name
jobs:
  deploy:
    runs-on: ubuntu-latest
    steps:
      - name: Checkout code
        uses: actions/checkout@v3
        with:
          submodules: true  # Fetch submodules if any

      - name: Install Hugo
        run: |
          wget https://github.com/gohugoio/hugo/releases/download/v0.92.2/hugo_extended_0.92.2_Linux-64bit.tar.gz
          tar -xzf hugo_extended_0.92.2_Linux-64bit.tar.gz -C /usr/local/bin

      - name: Build site
        run: hugo --minify

      - name: Deploy to gh-pages
        uses: peaceiris/actions-gh-pages@v3
        with:
          github_token: ${{ secrets.GITHUB_TOKEN }}
          publish_dir: ./public
- Use the corrected
masterbranch for your main branch andgh-pagesfor deployment. - Step 6: Ensure your
hugoconfiguration points to the correctbaseURLinconfig.toml
baseURL = "https://<username>.github.io/<repo-name>/"
- Step 7: Run these commands below to start the workflow now.
hugo
git add .
git commit -m "Add GitHub Pages deployment workflow"
git push origin master
- Step 8: Take a breather till the actions are getting completed.
- Step 9: After the actions are completed go the same settings/ pages option and open the deployment link.(As the link you are using to read the blog)
- Step 10: Here you go your Blog site is up and running for everyone to see.😍
Let’s Summarize#
- We write our content inside Obsidian.
- Copy this .md file into our Blogs directory using rsync/robocopy
- We create a copy of the images used in our blog to the
static/imagesfolder usingimages.py - Now we push it to our master branch after which the
deployment.ymldeploys it to our GitHub page using thegh-pgbranch.
Ughh the process seems so cumbersome 🤔.
The Ultimate python script for one command notes-> blog#
- Save the script with
.shextension
#!/bin/bash
set -euo pipefail
# Change to the script's directory
SCRIPT_DIR="$(cd "$(dirname "${BASH_SOURCE[0]}")" && pwd)"
cd "$SCRIPT_DIR"
# Set variables for Obsidian to Hugo copy
sourcePath="<source in obsidian>"
destinationPath="<Destination inside hugo content/blogs>"
# Set GitHub Repo
myrepo="reponame"

# Check for required commands
for cmd in git rsync python3 hugo; do
    if ! command -v $cmd &> /dev/null; then
        echo "$cmd is not installed or not in PATH."
        exit 1
    fi
done

# Step 1: Check if Git is initialized, and initialize if necessary
if ! git remote | grep -q 'origin'; then
    git remote add origin "$myrepo"
    echo "Remote 'origin' added."
else
    echo "Remote 'origin' already exists."

fi

# Step 2: Sync posts from Obsidian to Hugo content folder using rsync
echo "Syncing posts from Obsidian..."
if [ ! -d "$sourcePath" ]; then
    echo "Source path does not exist: $sourcePath"
    exit 1
fi

if [ ! -d "$destinationPath" ]; then
    echo "Destination path does not exist: $destinationPath"
    exit 1
fi

rsync -av --delete "$sourcePath" "$destinationPath"

# Step 3: Process Markdown files with Python script to handle image links
echo "Processing image links in Markdown files..."
if [ ! -f "images.py" ]; then
    echo "Python script images.py not found."
    exit 1
fi

if ! python3 images.py; then
    echo "Failed to process image links."
    exit 1
fi


# Step 4: Build the Hugo site
echo "Building the Hugo site..."
if ! hugo; then
    echo "Hugo build failed."
    exit 1
fi

# Step 5: Add changes to Git
echo "Staging changes for Git..."
if git diff --quiet && git diff --cached --quiet; then
    echo "No changes to stage."
else
    git add .
fi

# Step 6: Commit changes with a dynamic message
commit_message="New Blog Post on $(date +'%Y-%m-%d %H:%M:%S')"
if git diff --cached --quiet; then
    echo "No changes to commit."
else
    echo "Committing changes..."
    git commit -S -m "$commit_message"
fi

# Step 7: Push all changes to the main branch
echo "Deploying to GitHub Master..."
if ! git push origin master; then
    echo "Failed to push to master branch."
    exit 1
fi

echo "All done! Site synced, processed, committed, built, and deployed."
- Gives your script execution permission.
chmmod +x updateblog.sh
- Now lets run the scipt.
bash updateblog.sh
Finally#
- Just make changes to your blog, add more blogs
- go to your terminal, run the magic command
bash updateblog.sh - That directly puts out your content to the GitHub pages.
- Credits: Network Chuck(https://youtu.be/dnE7c0ELEH8?si=ctH_oufnQeyGmUkn)
Be Tuned for more blogs 🤗.#
Read other posts